Thursday, December 31, 2009

Doing what you love


Choose an activity you especially enjoy. Maybe it’s dancing or cooking or painting or making love or simply playing with your kids. Next time you engage in the activity, give yourself to it wholeheartedly. Don’t hold back or conserve your energy in any way. You might experiment with losing yourself completely in the activity, the way children do. Don’t keep looking at your watch or wondering how you’re doing; just do it without reservation — until you and the activity seem to merge and become one. How do you know when to stop? Do you suddenly find yourself disengaging? Or do you reach a natural stopping point when you intuitively know it’s time? And how do you feel when you’re done? Do you feel drained and tired? Or do you feel energized and excited? Think of this exercise the next time you sit down to meditate.

Giving your energy 100 percent


There’s a secret “law of energy” that applies just as well to meditation as it does to sports — and to life in general: The more you expend, the more you get back in return. You can be stingy about your energy, parceling it out from one activity to the next as though you have just so much to give and no more. But if you love something and give yourself to it wholeheartedly, you may notice that the energy just feeds on itself and keeps growing and growing. In the NBA finals one year, Michael Jordan was suffering from an intestinal flu so severe that he needed fluid IVs and could barely stand. Yet, carried aloft by his own dedication (what he called “heart”) and fueled by an energy that seemed drawn from a source far vaster than his own exhausted body, he suited up for his team and scored 38 points. Jordan embodied the quality of wholeheartedness.
In meditation, too, the more wholeheartedly you practice, the more you tap
into a seemingly limitless energy source. It’s as though the flame inside your

Restraining yourself, both on and off the cushion


Broadly speaking, self-restraint is the quality of mind that keeps you from acting on every impulse or desire that flits through your brain and that helps you discriminate between behavior that’s useful and supportive and behavior that’s unsupportive or even harmful. If you’re an athlete, you need selfrestraint to prevent you from eating junk food or staying out late when you’re training for a big competition. If you’re a meditator, self-restraint can function on several different levels:
  • Before meditation: You may choose to eat well and in moderation or avoid mind-altering substances such as tobacco or caffeine because you want to keep your mind clear and fresh for your meditation.
  • During meditation: You can use self-restraint to keep pulling your mind back from its habitual fantasies and preoccupations to the object of your meditation, be it your breath or a mantra or some other focus. Be careful, however, not to confuse self-restraint with repression, avoidance, or judgment. You don’t need to criticize yourself for wandering off, nor do you want to push certain “undesirable” thoughts or feelings out of your mind. Instead, just welcome whatever arises, while gently returning your focus to the object of your meditation.After meditation: As your practice deepens and strengthens, you build a certain power or energy of mind — in the East they call it samadhi. You can blow off this energy by daydreaming or planning or obsessing — or you can use self-restraint to channel your energy back into your practice of being mindful from moment to moment.
Like self-discipline, self-restraint has a bad rap in our culture. After all, aren’t you supposed to say what you think and do what feels right? But what feels right in the moment may not be the same as what feels right in the long run —and self-restraint is the faculty that helps you distinguish between the two. For example, you may be tempted to charge those plane tickets to Hawaii because it feels right, but you may have different feelings altogether when you get your credit card statement. In the same way, it may feel great to spend your meditation indulging in fantasy — until you start wondering in a month or two why you still can’t count your breaths from one to ten. Above all, though, remember to be gentle with yourself!

If you don’t dig sports, try gardening


Although meditating has a lot in common with practicing and playing a sport, for some folks, meditating may be more akin to gardening. After you plant the seeds, you don’t try to force the seedlings out of the ground, do you? You just water and fertilize, thin and water some more, and eventually the little shoots appear on their own, coaxed into the light by some complex and mysterious mixture of chemistry, genetics, phototropism, and who knows what else.
The point is, you don’t have to know — you just have to do your part and get out of the way! If you get carried away and overwater or disturb the ground prematurely, you only interfere with the process.
In the same way, you need to exert just the right amount of consistent effort in your meditation —don’t overwater or keep scratching the ground searching for signs of progress, but don’t go away for a week and leave your plot unattended, either. Do what you need to do without fixating on the results, and your garden will blossom quite naturally, all by itself.

Monday, November 30, 2009

Being consistent, day after day


Take sports again. If you train for a day and then slack off for a week, you won’t make much progress. In fact, you may end up straining a muscle or hurting your back because you haven’t conditioned your body gradually, as most fitness gurus recommend.
When you practice meditation, you’re developing certain mental and emotional muscles like concentration, mindfulness (ongoing attention to whatever is arising, moment to moment), and receptive awareness. Here, too, consistency is the key — you need to keep it up and keep it regular, no matter how you’re feeling from day to day. In fact, your feelings provide the fodder for your meditation practice, as you expand your awareness from your breath to include the full range of your experience. There’s no special way you need to be —just show up and be yourself!
As one old Chinese Zen master used to say, “Sun-faced Buddha, moon-faced Buddha” — by which he meant, happy or sad, energetic or tired, just sit as the being you happen to be.
Be especially wary of two extremes: laziness or self-indulgence (“I’d rather be sleeping, resting, watching TV”) and perfectionism (“I’m not ready to meditate. I’m not smart or good or focused enough.”) Remember, I’m talking about meditation for beginners here — and besides, the best way to become “good enough” to meditate is to just do it!

Making a commitment to yourself — and keeping it


When you commit to marriage or some other monogamous relationship, you make an agreement with yourself and your partner to stay together through thick and thin, no matter what life brings. Without this commitment, you may be tempted to leave when your partner becomes angry or does something you can’t stand — or when you find yourself withdrawing or “falling out of love.” Of course, you can always decide to end the relationship, but as long as you’re committed, you’re going to do all you can to maintain it. The same holds true for meditation. Commitment is the foundation for your meditation practice. Without commitment, you won’t keep meditating when you’re tired, have a headache, don’t feel like it, would rather do something else, or run up against some of the roadblocks. And what prompts you to make the commitment to meditate in the first place? You have to be motivated, which means you have to know how you can benefit from what meditation has to offer, and you must have strong personal reasons for continuing. These reasons may include a desire to alleviate personal suffering or stress, an aspiration to achieve greater focus and clarity, and a concern for the welfare of others. The commitment process usually involves five distinct steps — though it doesn’t necessarily have to be so formal:
  • Becoming motivated: Ouch, life hurts! I need to find out how to deal with my pain.
  • Setting your intention: I know, I’ll meditate for 30 minutes every day!
  • Making an agreement with yourself: From now until the end of the month, I agree to get up at 7 a.m. and count my breaths before I go to work.
  • Following through: Whew! I didn’t realize how hard it would be to sit still for so long — but I refuse to break my agreement with myself!
  • Gaining momentum: Wow! The more I meditate, the easier it gets. I’m really beginning to enjoy it.

The Meaning of Discipline


If you’re like most folks, the word discipline may be a bit of a turnoff. Perhaps it reminds you of some bossy teacher who made you stay after school or childhood punishments that were intended to “set you straight.” Or maybe you associate discipline with soldiers marching single-file or with prisoners forced to obey their keepers. But the discipline I’m talking about here is quite different. When I say discipline, I mean the kind of self-discipline that prompts top athletes like Tiger Woods or Venus Williams to get up every morning and run several miles and then practice their moves or their shots over and over, long after they’ve gotten them right. It’s the kind of self-discipline that motivates great writers to sit at their computers each day, no matter how they feel, and pound out their copy.
The truth is, you already have self-discipline, though you may not be aware of it. You need self-discipline to get to your job on time or to orchestrate a schedule filled with business commitments, personal interests, and family responsibilities. You need self-discipline to pay your bills or keep up a garden or take care of your kids. You merely need to apply the same self-discipline to the practice of meditation.
Again, self-discipline is nothing more than the capacity to do something again and again. But I find it helpful to break self-discipline down a little further into three parts: commitment, consistency, and self-restraint.

Friday, October 30, 2009

Finding the beauty of meditation


Even in the most chaotic and unappealing situations, you can attune yourself to a quality or dimension of beauty, if you try. Imagine that your mind is like a CD player, and you’re trying to tune in to a particular track. Or take one of those figure-ground puzzles. At first, you can’t even perceive the shape in the background. But as soon as you’ve seen it, you merely need to shift your awareness to see it again.
So, the next time you find yourself in an unpleasant place or circumstance — preferably not one with a strong emotional charge, because that might make this exercise too difficult — do the following:
  1. Take a moment to look for the beauty. You may notice a patch of green grass in the distance, or a bouquet of flowers on a table, or the laughter of a child, or an aesthetically pleasing piece of furniture. Or you may just notice a warm feeling in your belly or heart.
  2. Take a deep breath, set aside your stress and discomfort, and enjoy the beauty. Allow yourself to resonate with it for a few moments as you would with a favorite piece of music or a walk in the woods.
  3. Shift your focus back to the situation at hand and notice whether your attitude has changed in any way.
Know that you can shift your awareness in this way whenever you feel inclined.

How to set up an altar


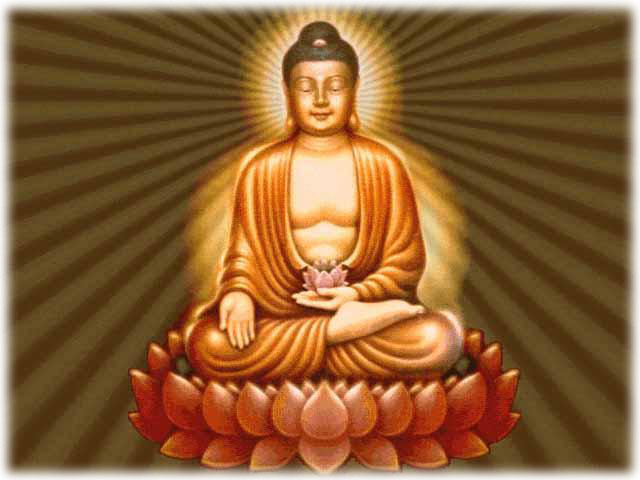
For many people, the word altar is fraught with associations. Maybe you have memories of being an altar boy as a kid — or you recall altars you’ve seen on special occasions like weddings or funerals or memorial services. For the purposes of this book, I use altar to refer to a collection of objects with special meaning and resonance for you that you assemble in one place and use to inspire your meditations. If you’re a Christian, for example, your altar may include a crucifix or a picture of Jesus; if you’re a Jew, you may have a holy book or a Star of David; or, if you’re a Buddhist, you may choose to contemplate a statue of Buddha or a photo of your teacher. And if you have no particular religious inclinations, you may be quite content with a few stones, a candle, and a potted plant.
Although an altar is not essential to meditation, it can be a creative and constantly evolving expression of your inner life, a reflection of your deepest aspirations, values, and beliefs. Gazing at your altar before you sit can evoke your connection to a spiritual dimension of being — or it can merely remind you of why you’re here: to develop concentration, relax, open your heart, heal your body. Here are some of the main ingredients that appear on many altars; feel free to improvise and add or subtract as you see fit:

_ Bells
_ Candles
_ Flowers
_ Incense
_ Natural objects
_ Pictures (of nature or inspirational figures)
_ Sacred texts
_ Statues (of inspirational figures)

Some traditions recommend that altars appeal to all the senses — hence, the incense, bells, flowers, and candles, which are mainstays on many home altars. In particular, the fragrance of your favorite incense can quickly become hyperlinked in your brain with meditation, causing you to relax just a little whenever you smell it.
As with your meditation, it’s best to keep your altar simple at first. Use a small, low table or cabinet (if you meditate on the floor) covered with a special piece of cloth. If you want, you can enrich and expand it over time, or you may prefer to keep a stash of objects and rotate them as the spirit moves you. For example, you can adapt your altar to the seasons, with flowers in spring, seashells in summer, dried leaves in autumn, pine boughs in winter, and so on. One cautionary note about pictures: You may want to devote your altar to mentors, teachers, and other figures whose presence fills you with unadulterated inspiration — and consign to your desk or bureau those loved ones for whom your feelings may be more complex, like children, parents, spouses, and friends.

How to pick the right meditation spot?


If you share a small apartment with a partner or friend, or your family has usurped every square foot of usable space at your house, by all means choose the only vacant corner and make it your own. If you have more leeway, here are a few guidelines for picking your spot. And remember, even a modest patch of floor that meets these criteria is better than a sumptuous suite that doesn’t:
  • Off the beaten track: You know the heavily trafficked highways in your house, so be sure to avoid them. And if you don’t want someone inadvertently barging in on you just when you’re starting to settle, tell your housemates you’re going off to meditate — they’ll understand. And if they don’t . . . well, that’s another issue you may eventually have to face. _ Away from work: If you work at home or have a desk devoted to personal business, keep it out of sight — and mind — when you’re meditating. And if possible, remember to shut off your phone; there’s nothing quite as distracting to your mind as wondering who’s trying to reach you now!
  • Relatively quiet: Especially if you live in the city, you probably won’t be able to eliminate the usual background noises — the drone of traffic, the shouts and laughter of kids on the street, the hum of the refrigerator. But you should, if at all possible, avoid audible conversations, especially among people you know, and the sounds of TV, radio, popular music, and other familiar distractions. These are the kinds of recognizable noises that can pull your mind away from its appointed task, especially when you’re just starting out.
  • Not too dark or too light: Sitting in a bright, sunny spot may be too energizing and distracting, just as sitting in the dark can put you to sleep. Be sure to modulate the lighting with your attention level in mind: If you’re sleepy, open the blinds or turn on an extra light; if you’re wired, tone down the illumination accordingly.
  • Fresh air: Because we’re talking breath here, it’s great to have a supply of fresh air where you meditate. Avoid musty basements and windowless closets; besides being bad for your health, they tend to lower your energy (along with your O2 level) and lull you to sleep. Close to nature: If you don’t have a tree or a garden outside the window near where you meditate, you may want to have a plant or a vase full of flowers or a few stones nearby. Not that you’ll be gazing at them while you sit, but natural objects radiate a certain special energy of their own that lends support to your practice. Besides, you can pick up a few pointers by watching how rocks and trees meditate — they’ve been doing it a lot longer than we have.

Tuesday, September 29, 2009

Why it’s best to stay put


Just as it helps to have a regular time to meditate, there are some definite advantages to sitting in the same location day after day, instead of moving from place to place. These include
  • Fewer distractions: As a beginner, you already have plenty of distractions to contend with, both inner and outer. Why add all the nuances of a constantly shifting external environment? Once you get used to seeing those little stains on the carpet and those cracks in the paint, you can free up your attention for the matter at hand: meditation.
  • Good vibes: The more often you sit there, the more you infuse your spot and its environs with the energy of your efforts — your good vibes, if you will. Whenever you return, your meditation is buoyed and supported by the energy you’ve invested, just as you feel especially comfortable and relaxed in your favorite chair.
  • Peaceful memories: When you’ve picked your spot, you start associating it with meditation, especially if you keep your altar or your sitting gear there. Just passing it on your way to other activities reminds you to come back to meditate when you next have a chance. And if your meditation involves spiritual aspirations, your spot becomes a sacred site where your deepest insights and reflections take place.

Meditating in nature


As you may already have noticed, the natural world has an unparalleled capacity to relax your body and calm your mind. When you’re sitting by the ocean listening to the surf or hiking in the mountains among the rocks and trees, you don’t have to practice some formal meditation technique — just open your senses and let nature work its magic. Without any effort on your part, you begin to feel your mind settle down, your worries dissipate, your breathing deepen and slow, your tension melt away, and your heart fill with gratitude and love.
As a species, we evolved in the natural world, and the plants and animals have been teaching us how to meditate for as long as we’ve had legs to cross. When you meditate in nature, you’ve arrived where you belong, and the ease and familiarity you feel there invites you to return home to yourself, to your innermost “nature.” (How fascinating and appropriate that the words are the same!) Entering a natural setting can stop your mind in its tracks, causing you to sense the presence of something deeper and more meaningful.
Make it a point to meditate in nature as often as you can, and take note of the state of mind and heart that it evokes. Even if you live in the inner city, you can usually find some park or garden or small patch of woods or water. Then, when you meditate at home again, you can invoke the resonance of your moments in nature to help you deepen your practice.

Where to Meditate: Creating Sacred Space

Perhaps you’ve seen those Chinese paintings where a bearded sage in a flowing robe sits in deep contemplation at the base of some majestic peak with a waterfall thundering beside him. Maybe you’ve even had moments when you wished you could become that sage, disappear into the mountains, and meditate in silence and simplicity for the rest of your days. Alas, life doesn’t usually support us nowadays in actualizing such fantasies! Instead of shaving your head and heading for the hills, however, you can follow a few simple guidelines for carving out a special place for the practice of meditation. You’ll find that the space you set aside will enrich your life in ways you can’t imagine.

Sunday, August 30, 2009

Meditation and TV: From the couch to the cushion


I have to confess that I’m one of those reactionary people who cheer every time they see the bumper sticker “Kill your TV.” Here’s why. Not only does television inundate you with disturbing images you wouldn’t otherwise have to endure — images of conflict, cruelty, seduction, exploitation, and outright violence that leave a deep and lasting impression — but TV also dulls your mind by habituating it to nonstop stimulation. With your mind accustomed to being flooded with images and sounds, you find it more difficult to enjoy the ordinary moments of everyday life or to register subtler levels of experience — the kind you’re trying to access in meditation.
Studies have also shown that tube-time inhibits the natural, age-appropriate development and integration of the various lobes of the brain. Children who grow up on lots of TV are generally less imaginative, more restless, more aggressive, and more easily bored than those who don’t. Did you ever wonder why so many teenagers hang around shopping malls looking listless and brain-dead? Television may be the answer.
Needless to say, you’re doing yourself a favor when you substitute an hour on the meditation cushion for an hour on the couch. You’re more likely to find what you’re looking for — relaxation, happiness, joy, peace of mind. And you’ll come away more refreshed and more open to new experiences, both inner and outer. But like most addictions, a TV fixation can be hard to kick. Start out slowly, say, by giving up a few hours each week and substituting some other activity that you find genuinely nurturing or fulfilling — going for a walk, talking with a friend, spending quality time with your family. Of course, you may not want to give up your favorite sitcom, the Sunday game, or the evening news — but then, who knows?

What to Eat and Drink before You Meditate?


Big meals can make you drowsy, especially when they’re high in carbohydrates, so eat lightly if at all before you sit. Or wait at least one hour after a major repast. You might even consider following the traditional Zen guideline to eat until you’re two-thirds full, instead of bursting at the seams — it may not be bad for your waistline, either.
As for drinking (and smoking), here are a few suggestions: I do know seasoned meditators who like to down a cup of cappuccino before they sit, and at least one Zen master who made it a habit of meditating first thing in the morning after drinking too much sake the night before. But as a general rule, abstaining from mind-altering substances (for example, coffee, alcohol, tobacco, marijuana, and other recreational drugs) before meditating is best. As your practice grows and you observe the benefits of being present and focused, rather than zoned out or drugged up, you may naturally diminish your intake. In fact, you may discover that meditation makes you more sensitive to your state of mind and provides a natural high that renders these substances unnecessary or obsolete. And if your primary motivation for meditating is to reduce stress or enhance your health, you may consider abstaining entirely from your substance of choice. Believe it or not, indulging only adds to the burden of stress you’re already experiencing.

20 minutes to an hour


The longer you sit, the more time you’ll have between preliminaries and endings to settle into a focused and relaxed state of mind. If you have the motivation and can carve out the time, by all means devote 20 minutes, 40 minutes, or an hour to meditation each day. You’ll notice the difference — and you’ll understand why most meditation teachers recommend sitting this long at a stretch. Perhaps it’s the human attention span — look at the proverbial 50-minute hour of psychotherapy or the optimal length for most TV shows. Keeping your practice steady and regular is better than splurging one day and abstaining for the rest of the week.

Thursday, July 30, 2009

Why bother to time your meditations?


You’re welcome to experiment with sitting down to meditate when you feel like it and getting up when you’re done. But there are some excellent reasons for deciding when and how long before you begin meditating and then sticking to your plan:
  • Your mind is seductive. If you don’t make a commitment to stay put for a certain period of time, your mind will find all kinds of compelling reasons for you to get up and do other things. Instead, you can watch your mind go through its gyrations, without being seduced.
  • You can forget about the clock. When you decide how long you’re going to sit, you don’t have to obsess about the time anymore —and you can relax and concentrate on your practice instead.
  • You can develop regularity. Like building a muscle, you can begin with 5 minutes and gradually work up to 15 or 20 minutes. In the same way, sitting at the same time every day creates a natural circadian rhythm to your meditation, which makes it easier to keep going.

How Long to Meditate: From Quickies to the Long Haul


Meditation resembles sex in a number of ways, and this is one of them: You may prefer it short and quick or long and slow. But whatever your predilections, you would probably agree that some sexual contact with your beloved is better than no sex at all.
Well, apply this dictum to meditation, and you’ll get the drift. If you can’t schedule a half-hour, then meditate for a few minutes. Sitting for five or ten minutes every day is much better than sitting for an hour once a week — though you may want to do both. Experiment with the different options until you find the one that suits you best. Digital alarm watches provide an accurate and inexpensive way to time your meditations precisely without watching the clock. Also, you may want to signal the beginning and end of your meditation with the sound of a small bell, as is done in many traditional cultures.

Five minutes
If you’re a beginner, a few minutes can seem like an eternity, so start off slowly and increase the length of your sittings as your interest and enjoyment dictate. You may find that, by the time you settle your body and start to focus on your breath, your time is up. If the session seems too short, you can always sit a little longer next time. As your practice develops, you’ll find that even five minutes can be immeasurably refreshing.

10 to 15 minutes
If you’re like most people, you need several minutes at the start of meditation to get settled, a few more minutes to become engaged in the process, and several minutes at the end to reorient — which means that 10 or 15 minutes leaves you a little in the middle to deepen your concentration or expand your awareness.
When you’ve made it this far, try leveling off at 15 minutes a day for several weeks, and watch how your powers of concentration build.

20 minutes to an hour
The longer you sit, the more time you’ll have between preliminaries and endings to settle into a focused and relaxed state of mind. If you have the motivation and can carve out the time, by all means devote 20 minutes, 40 minutes, or an hour to meditation each day. You’ll notice the difference — and you’ll understand why most meditation teachers recommend sitting this long at a stretch. Perhaps it’s the human attention span — look at the proverbial 50-minute hour of psychotherapy or the optimal length for most TV shows. Keeping your practice steady and regular is better than splurging one day and abstaining for the rest of the week.

When to Meditate: Any Time’s the Right Time


If you’re incredibly busy, pencil in formal periods of meditation whenever you can find the time. But if you have the luxury of choosing or would like to meditate as often as you can, I fill you in on some of the best times to sit in the following sections.
Ultimately, every moment and every activity can provide an opportunity to be mindful.

First thing in the morning
Traditionally, the hour or two right after you wake up — preferably around sunrise — is considered the best time to meditate. Your mind and body are refreshed and energized by deep sleep, and you haven’t yet started to obsess about your usual worries and concerns. As a result, you may find it easier to focus and stay present. By meditating first thing, you also set the tone for the rest of the day and can extend whatever peace of mind you generate to your other activities.

Before bed
Some people take an hour or two to wake up from the dreamy fog of sleep, and others have just enough time to roll out of bed, grab a cup of coffee, and rush out to join the morning commute. If you’re groggy when you get up or have to switch to high gear the moment your feet hit the floor, try meditating in the evening before bed. It’s a great way to prepare for sleep, because it allows your mind to settle down and shift naturally and with ease from waking to slumber. In fact, meditators who sit at bedtime often report that their sleep is more restful and they need less of it. Of course, the downside is that you may feel as though you’re too tired or stressed out to meditate at the end of the day — and you may wind up taking a hot bath or watching TV instead. But when you get into the habit, you’ll find that evening meditations are an excellent option with some distinct advantages of their own.

Right after work
Though not as reliable as mornings or bedtimes because it’s often usurped by errands, early dinners, or family emergencies, the transition between work and home can be a fitting moment to take a few deep breaths and let your body and mind settle — instead of reaching for the paper or flipping on the tube.

Lunch hours and coffee breaks
If you have an office of your own and a time set aside for lunch or coffee —a big if, because more and more people eat on the fly these days — plan on bringing your food or scoring your java in advance and spending the rest of the time meditating. You might even set aside a special space in your office —including an altar, if you’re so inclined.

While waiting for your kids and at other predictable downtimes
If you’re like many parents, you may spend hours each week shuttling your kids from one activity or playdate to another — and sitting in the car or running errands while you wait for them to finish. Instead of picking up a magazine or listening to the news, try meditating. (You can take the same approach to waiting for your doctor or dentist.) It may not be the best environment and your posture may not be ideal, but look — it’s a stretch of precious idle time. Use it wisely.

Monday, June 29, 2009

Meditating with music


When you’re moving too fast to sit and be mindful, you can use certain kinds of music to help you tune in to a slower, steadier, less jarring rhythm before you begin meditating. The music you choose depends on your taste — one person’s “aaahh” is another one’s “ouch.” Some people relax to classical or jazz, while others seem to need the intense sounds of heavy metal or the staccato rhythms of rap before their bodies settle down.
By all means, use a favorite CD to soothe your savage beast at the end of a long and stressful day — preferably something that joins you where you are and then gradually lulls you into a quieter space. When you’re breathing a little easier, you can head for your meditation corner. Or you can make listening to music a meditation in itself. Begin by being mindful of the music the way you’d be mindful of your breathing. Instead of thinking or daydreaming, listen with full attention to the sounds as they unfold in your awareness. When your mind wanders off, return to the music. At times, you may even lose yourself in the sound so that you, as the listener, disappear and only the listening remains. Such moments of deep meditation offer a glimpse of your essential being that can’t be understood by the mind, but they have a powerful effect nevertheless.

Keeping good head and shoulders


In Zen, good posture refers to more than how you position your back and legs; it refers to an attitude toward life in general. Attentive yet relaxed, you face each moment and each situation directly, with a bearing that suggests: “I’m open to whatever arises. I’m present and ready to respond.” One of my teachers, the Tibetan meditation master Chogyam Trungpa Rinpoche, used to call this “keeping good head and shoulders.” If you have an alarm watch, set it to beep every hour for the rest of the day. (If you don’t, just do this exercise at random times.) When your watch beeps, take a moment to pay attention to your body. How am I standing or sitting right now? Am I slouching or slumping? And if so, how would it feel to gently extend my spine and align myself with gravity?
Notice how this subtle shift affects your mood and your outlook on life as you go about your day.

Ten quick steps to prep your body for meditation


This handy list provides a user-friendly summary of the steps described in detail earlier in this chapter:
1. Arrange your legs.
2. Lengthen your spine.
3. Rock your body from side to side like a pendulum.
4. Rock your body from front to back.
5. Tilt your pelvis slightly forward and soften your belly.
6. Tuck your chin gently.
7. Rest your tongue on the roof of your mouth and breathe through your nose, if possible.
8. Rest your hands on your thighs or in your lap.
9. Relax your body from head to toe, letting go as much as possible of any tension or discomfort.
10. Begin your meditation.

Friday, May 29, 2009

Cradle stretch

As the name may suggest, you cradle your leg in your arms as you would a baby, stretching and opening your hips in the process. Be sure to lift your leg slowly and gently — remember, you’re stretching, not wrenching.
Follow these instructions with the careful attention of a loving mother:
  1. Sit on the floor with your legs extended in front of you.
  2. Bend one knee, rotate your thigh to the side, and cradle your lower leg in your arms. Keeping your hands clasped, hold your knee in the crease of one elbow and your foot in the crease of the other.
  3. 3. Keeping your spine extended and your head erect, gently rock your leg horizontally from side to side, rotating at your hip.
  4. 4. Continue this rocking motion for five to ten breaths, breathing deeply and smoothly; then gently put your leg down the same way you picked it up and do the same stretch with the other leg.

Butterfly pose meditation

Especially challenging for runners and other athletes, this pose stretches the inner thigh, groin, and hip. As its shape suggests, it gradually opens your “wings” and helps your knees reach the floor in cross-legged poses.
Do the stretch like this:
  1. Sit on the floor with your legs extended in front of you. If you have difficulty keeping your back straight, place a small cushion under your buttocks so that your pelvis tilts forward slightly.
  2. Bend your knees and bring the soles of your feet together with the outside edges of both feet on the floor.
  3. Clasping your hands together, grasp both feet, draw your heels in toward your groin, and gently press your knees toward the floor while extending your spine. Feel the stretch in your groin, thighs, hips, and lower back. Resist the temptation to bounce or force your legs. If your knees stick up in the air, don’t worry. It’s more important to keep your back straight than to touch the floor with your knees.
  4. Hold the stretch for five to ten breaths while breathing deeply into your abdomen.As you exhale, release your feet, extend your legs in front of you, and relax.

Lunge Pose Meditation

Billed as a back stretch, this asana also opens your hips and groin. If you have time for a only few poses, combine this one with the Cat pose and Butterfly pose for a mini routine.
Follow these steps and enjoy the stretch:
  1. Begin on your hands and knees with your spine horizontal and your arms and thighs perpendicular to the floor (like a four-legged animal).
  2. Move your left knee forward and place your left lower leg on the floor with your heel close to your right groin.
  3. Extend your right leg straight behind you with your knee facing downward.
  4. Sink your pubic bone toward the floor, while lifting your chest gently upward and forward with your weight on your arms and right leg. Make sure that any torque in your bent leg occurs in the hip joint, not the knee. Feel the stretch in your lower back, in the hip joint of your bent leg, and in the groin, hip, and thigh of your straight leg.
  5. Hold the stretch for five to ten breaths; then repeat on the other side.

Tuesday, April 28, 2009

Locust meditation pose

Also named for an animal, this asana recalls a grasshopper with its abdomen lifted into the air behind it (see Figure). Because it stretches and strengthens the lower back, the Locust pose provides crucial support for the practice of sitting up straight, whether in meditation or any other sedentary activity. Begin with the half Locust and graduate to the full Locust when your lower back feels strong enough. (If you have lower-back problems or feel any pain during half Locust, you should abstain from full Locust.) Move slowly and carefully and avoid any movement that causes you pain — except the dull ache of a good stretch.
Here are the steps you follow to practice this pose:
  1. Lie face down with your chin on the floor and your arms at your sides, palms up.
  2. Making a partial fist with both hands, move your arms under your body and position your hands under your pubic bone, thumbs lightly touching.
  3. At this point, you can do either the half Locust or the full Locust, as follows:
  • • For half Locust: Contract your buttock muscles slightly and inhale. As you exhale, lift one leg completely into the air without bending your knee. Hold for five to ten breaths; then lower your leg and do the same with the other leg. Repeat three or four times on each side. When you’re done, turn your head to one side and relax.
  • • For full Locust: Contract your buttock muscles slightly and inhale.
As you exhale, lift both legs completely into the air without bending your knees. Hold the pose for five to ten breaths, breathing deeply into your abdomen; then lower your legs, turn your head to one side, and relax.

Monday, March 30, 2009

Cobra pose meditation

Named for its resemblance to the graceful serpent, this asana provides a great backward stretch for your spine — and an antidote to any tendency to slouch forward. Instead of leading with (and possibly overarching) the lower back, be sure to initiate the stretch in your upper back and gradually extend it down your spine To get the benefits of this stretch, do it this way:
  1. Lie face down with your forehead on the floor.
  2. Place your hands under your shoulders with your fingertips facing forward and the outside edge of your hands even with the edge of your shoulders.
  3. Draw your elbows in so that your arms touch the sides of your torso.
  4. Keep your feet together and press your legs and thighs into the floor.
  5. Raise your chest slowly away from the floor, lifting and extending from your upper back, with your head and neck in alignment with your spine. At first, you may find that your chest doesn’t rise very far, but don’t force yourself in any way. Your back will gradually become more flexible.
  6. Keeping your shoulders relaxed, gently press your chest upward and forward and open your abdomen while pressing your pubic bone into the floor.
  7. Breathe deeply and smoothly, holding the pose for five to ten full breaths.
  8. As you exhale, slowly unfold the pose, vertebra by vertebra, until you’re once again lying face down with your forehead on the floor.
  9. Turn your head to one side and relax completely.

Cat pose meditation with variations

Watch how a cat stretches after a nap, and you’ll understand how this pose got its name. Not only does it stretch and strengthen your spine for sitting, it’s also a great way to start your day. Try rolling out of bed first thing in the morning, limbering up with the Cat pose, doing 10 or 15 minutes of meditation, and then going about your day Here’s how you practice the Cat:
  1. Begin on your hands and knees with your spine horizontal and your arms and thighs perpendicular to the floor (like a four-legged animal).
  2. As you exhale, arch your spine upward slowly like a cat, beginning the stretch at your tailbone. Feel your spine flexing vertebra by vertebra.
  3. At the culmination of the stretch, tuck your chin slightly.
  4. As you inhale, flex your spine downward, beginning with your tailbone and lifting your head slightly at the end of the stretch.
  5. Continue to breathe and stretch in this way for 10 to 15 breaths.
You can also do two variations of the preceding Cat pose, as follows:
  • Variation 1: From the four-legged position (Step 1), gently turn your head on an exhalation and look at your left hip, as you simultaneously move your hip toward your head. Inhale and come back to center and repeat to the other side. Continue for 10 to 15 breaths.
  • Variation 2: From the four-legged position (Step 1), move your hands slightly forward of perpendicular and draw broad circles with your hips, moving forward as you inhale and backward as you exhale. Continue for 10 to 15 breaths.

Four tried-and-true meditation positions — plus a few more


If you can’t sit comfortably in any of the usual sitting positions, you can take heart from the Buddhist tradition, which offers four equally acceptable alternatives for formal meditation:
  • Sitting
  • Standing
  • Walking
  • Lying down
Giant statues in India and Southeast Asia show the Buddha himself meditating while lying on his right side with his head cradled in his hand. Yogis and ascetics have long meditated while standing, sometimes on one leg. And walking meditation is still widely practiced throughout the world, from the Zen monasteries of Japan and the forest monasteries of Thailand to the Sufi communities of the Middle East and the Christian hermitages of Europe and North America.
Of course, the Sufis recognize a fifth traditional posture — the spinning dance of the dervishes — and the Taoists teach the martial art t’ai chi as a moving meditation. In the West, some of the followers of Swiss psychologist C. G. Jung have developed a meditative form known as authentic movement, and some Christians practice walking in contemplation around a spiral labyrinth. Ultimately, any activity can become a meditation if you do it mindfully.
At formal silent retreats, I’ve seen people meditating in wheelchairs, newcomers perched on high cushions surrounded by bolsters, and oldtimers who do nothing but walk or lie down for ten days. And I’ve seen a photo of the great Indian yogi Swami Muktananda meditating while roosting like a bird in a tree. The point is, there’s no one right way to do it — just discover what works for you.

Friday, February 27, 2009

Preparing Your Body for Sitting


If you can sit in meditation for 10 or 15 minutes each day without discomfort, congratulations! You needn’t spend any additional time learning how to stretch and strengthen your body — unless, that is, you’re so inclined. But if you’re like most people, sooner or later your body will start clamoring for your attention. For example, you may find that regular sitting causes your back to stiffen occasionally. Or you may try to work your way into one of the more challenging cross-legged poses — only to discover that your legs just aren’t as flexible as you imagined.
A few well-placed hatha yoga poses can do wonders for your body — and make sitting a whole lot more comfortable, too! Whichever sitting position you choose, you’ll enjoy it more if your lower back is flexible and strong enough to support you without complaining. And if you prefer to cross your legs, you’ll find that stretching your hips allows you to sit with more stability and far less strain on your knees. With these needs in mind, the following sections highlight six yoga poses (also known as asanas) to help prepare you for sitting. The first three help to stretch and strengthen your lower back; the second three work on opening your hips and making them more flexible.
When you’ve chosen the poses that seem best for you, be sure to practice them gently and carefully, treating your body with the kindness you would reserve for a close friend. Enjoy the stretch, but back off gently if you feel any pain. (If you don’t have carpeting, use a yoga mat or a rug between your tender parts and the floor.)

Zafus, benches, and other exotic paraphernalia


Depending on which meditation tradition you explore, you’re likely to encounter a range of different sitting devices. Some yogis I know like to plop down a tiny rectangular bag filled with rice before they artfully settle onto it and cross their legs in full lotus. Many Zen folks and other Buddhists prefer the plump round cushions known as zafus (Japanese for “sitting cushions”), often combined with flat, square cushions filled with cotton batting for extra height, if needed Zafus have infiltrated the meditation halls of every spiritual lineage and denomination, from Sufis and Buddhists to Christian monastics. Zafus are generally stuffed with kapok, which are silky natural fibers that keep their shape despite repeated sittings. But I’ve seen hefty zafus filled with buckwheat husks or cotton batting and even thick rectangular ones filled with hard polyurethane foam.
Before buying a zafu, be sure to try out a number of different shapes and sizes, checking them for relative comfort, stability, and height. You want to be able to sit so both knees touch the floor, if possible, and your pelvis tilts slightly forward.
If you’re a kneeler, you can try sitting on a zafu or other convenient cushion placed on the floor between your legs, or you can use one of the meditation benches designed exclusively for the purpose. Again, experiment before buying. If you’re a chair sitter, choose one with a firm cushion and a straight back — not one of those plush armchairs into which you can comfortably disappear and drift off. Just be sure your buttocks are somewhat higher than your knees.

Meditating on your posture


As an alternative to following your breath, especially when you want to calm your mind before turning to the practice of mindfulness, you can experiment with the time honored Zen technique of concentrating on a particular part of your body. Try placing your mind in the palm of your hand, if your hands are folded in Zen mudra, or on your belly, at a point about 2 inches below your navel (known as the hara in Japanese). After you practice this approach for a period of time and your attention stabilizes, you can expand your focus to include your whole body, maintaining the same level of Zen-style concentration.

Thursday, January 29, 2009

Why the Buddha sat in lotus position


Unfortunately, we didn’t learn to sit crosslegged on the floor when we were kids, the way most Indians and many other traditional Asians did. As a result, you may find it difficult to sit cross-legged at first, and you may feel inclined to retreat to the apparent ease and comfort of a chair. But I’d like to encourage you to give cross-legged sitting a try at some point, if your body and comfort level allow. It isn’t necessarily as difficult or as painful as it appears — and besides, it has some unique advantages. For one thing, crossing your legs creates a solid, stable foundation for the rest of your body and tends to tilt your pelvis forward naturally at just the right angle to support your spine. Also, there’s something about sitting the way the great meditators of the past used to sit that lends a certain power and authority to your meditation — as though crossing your legs immerses you in a river of awareness that dates back thousands of years.
Finally, sitting with your buttocks on or close to the earth directly connects you with gravity and the other energies the earth emanates — and gives a palpable feeling of groundedness and strength to your meditation.
Ultimately, of course, whatever you do with the lower half of your body is fine, as long as you can sit comfortably and keep your back straight with relative ease. But you can work up to the luxury of cross-legged sitting by gradually stretching your hips, until, one day, both knees touch the floor and — voilĂ ! — you’ve arrived.

Straightening your spine without rigor mortis

When you’re settled into a comfortable sitting position, with your pelvis tilted slightly forward, you can turn your attention to straightening your back. Of course, straight is a misnomer when used to refer to the spine, because a healthy back actually has several distinct curves, one at the lumbar region or lower back, another at the thoracic area or midback, and a third at the neck or cervical spine.
Unfortunately, these natural curves are often exaggerated by the demands of computer workstations and other sedentary environments, and you gradually get into the habit of sitting hunched over, with your shoulders rounded, your upper back collapsed, and your neck and head craned forward like a turkey vulture — the way I’m sitting right now! You may not be able to reverse sitting habits like these in a few sessions of meditation, but you can experiment with extending your spine — a more accurate term than straightening — and slowly but surely softening those curves back to their natural, graceful arch. You may find yourself carrying these new sitting habits into your other activities so that in time, you’re gently correcting your posture while driving your car or sitting at your desk, for example.
Try one or all three of the following images to help you discover what a straight or extended spine feels like. Don’t bother to look in the mirror or compare yourself to some ideal you’ve picked up in books (even this one). The important thing is how your body feels from the inside. You want to feel centered, stable, grounded — and aligned with the force of gravity:
  • Suspending your head from a string: Imagine that your entire body is suspended in the air from a string attached to the crown of your head. (The crown is the highest point on the top of your skull, toward the back.) As you feel the string pulling your head up into the air, notice how your spine naturally lengthens, your pelvis tilts forward, your chin tucks, and the back of your neck flattens slightly.
  • Stacking your vertebrae one on top of another: Imagine your vertebrae as bricks that you’re stacking one on top of the other, beginning with the first at the base of the spine. Feel your spine growing up toward the sky brick by brick, like a skyscraper.
  • Sitting like a mountain or tree: Imagine your body as a mountain or tree with a broad base that extends deep into the earth and a trunk or peak that reaches toward the sky (see Figure). Notice how stable, grounded, and self-sufficient you feel.

Lotus Positions

Quarter lotus
Exactly like half lotus (see the following section), except that your foot rests on the calf of your opposite leg, rather than on the thigh (see Figure A).

Half lotus
The half lotus is easier to execute than the famous full lotus (see the following section), and nearly as stable (see Figure B). With your buttocks on a cushion, place one foot on the opposite thigh and the other foot on the floor beneath the opposite thigh. Be sure that both knees touch the floor and your spine doesn’t tilt to one side. To distribute the pressure on your back and legs, remember to alternate legs from sitting to sitting, if you can — in other words, left leg on the thigh and right on the floor, then left on the floor and right on the thigh.

Full lotus
Considered the Everest of sitting positions. With your buttocks on a cushion, cross your left foot over your right thigh and your right foot over your left thigh. As with its more asymmetrical sibling, half lotus, it’s best to alternate legs in order to distribute the pressure evenly. Full lotus has been practiced throughout the world for many thousands of years. The most stable of all the poses, don’t attempt it unless you happen to be particularly flexible — and even then I suggest preparing by doing some of the stretches.

Tuesday, January 13, 2009

Burmese position


Used throughout Southeast Asia, the Burmese position (see Figure) involves placing both calves and feet on the floor one in front of the other. Though less stable than the lotus series, it’s much easier to negotiate, especially for beginners. With all the cross-legged poses, first bend your leg at the knee, in line with your thigh, before rotating your thigh to the side. Otherwise, you risk injuring your knee, which is built to flex in only one direction, unlike the ball-and socket joint of the hip, which can rotate through a full range of motion.

Easy position

This position is not recommended for extended periods of sitting, because it’s not very stable and doesn’t support a straight spine. Simply sit on your cushion with your legs crossed in front of you, tailor-fashion. (Believe it or not, tailors once sat this way!) Your knees don’t have to touch the floor, but do keep your back as straight as you can.
You can stabilize the position by placing cushions under your knees; gradually decrease the height of the cushions as your hips become more flexible (which they naturally will over time). When your knees touch the ground, you may be ready for Burmese or lotus position (see the following sections for these positions).
This pose can be a short-term alternative for people who can’t manage the other positions in this section, can’t kneel because of knee problems, or don’t want to sit on a chair for some reason.

Kneeling (with or without a bench)


This position is popular in ancient Egypt and in traditional Japan, where it’s called seiza (pronounced say-za; see Figure). Kneeling can be — well, hard on your knees, unless you have proper support. Try placing a cushion under your buttocks and between your feet — or use a specially designed seiza bench, preferably one with a soft cushion between you and the wood. Otherwise, your bottom and other tender parts may fall asleep.

Sitting in a chair meditation


Notice that I say sitting, not slouching (see Figure). The trick to meditating in a chair is positioning your buttocks somewhat higher than your knees, which tilts your pelvis forward and helps keep your back straight. Old-fashioned wooden kitchen chairs work better than the upholstered kind; experiment with a small cushion or foam wedge under your buttocks.